Labels

Saturday 4 January 2014

Week 47 to Week 49 Final Showpiece

Our final assessment for sugar work is to make a showpiece using pastillage and 2 other types of sugars. It was hard to decide on a theme but I finally decided to make an underwater theme with fishes. My showpiece was an abstract design and was meant to be a sweet buffet showpiece for a birthday party where the fish represents longevity. 

I wanted it mostly pastillage but our trainer said I should try to incorporate more sugar medium into it. She suggested that I make a fish by blowing sugar. I wasn't confident about it as I remembered how long it took me to blow a sphere 2 weeks ago. Basically I didn't get any sphere! 

We had 4 days spread across 2 weeks to finish our showpiece. So on the first 2 days, all the parts to the showpiece were made and stored for the following week where we assembled it.  My pastillage pieces were cut and left to dry. Most of them made 2 shares of pastillage but I seem to have enough. Wonder if I am rolling it too thin. I even had 2 extra fishes as spare. 
Pastillage left to dry
Pulled Sugar
Pulled Sugar in green
First I made the pulled sugar, I made one green colour for my seaweed and another yellow which was going to be used later. Pull Sugar is made by boiling granulated sugar with water till 110˚C, then adding glucose syrup into it and continue to boil till 150˚C. Then tartaric acid is added then boil till 156˚C. Quickly we arrest the sugar (sounds cool doesn't it?, it just means stop the sugar from boiling any further by dipping the bottom of the pot into a basin of cold water) Then we pour the sugar onto a silicon mat to cool and we pull and stretch the sugar till it is shiny. When the sugar is pulled, air is incorporated into the sugar which gives it the satin shine. 
Sugar casting for the base
Then I made sugar casting, which is where the sugar is boiled with water and glucose is added when temperature is 110˚C, then colour is added at 130˚C and continue to boil till 156˚C. After arresting the sugar, I added some silver lustre dust into the sugar to give it a nice shimmery effect. Then I poured it into a cake ring which has been sprayed with oil and wrapped with aluminium foil. Then let it cool completely. 
Pressed Sugar
Pressed Sugar is the easiest to make. It is just sugar and a little bit of cold water and colour. Then it is pressed into a mould and left to dry for about a week. Then pop it out and done, pressed sugar. 
Rock Sugar as the coral
Rock sugar was quite interesting to make, it was boiling the sugar and water together and pouring royal icing into it. Then it starts to bubble up like mad science project. Then quickly without deflating the air in the sugar, it is poured into a large bowl that has been lined and oiled. Again, it is left to cool completely.


Blown Sugar whale

Now I had time in my hands so I attempted to blow the fish. If I can get fish to look good then I will use them on the showpiece, otherwise I will stick with the pastillage fish. After a few attempts, I was successful with the fish! I intended to make a dolphin shape fish but got a whale instead.. hahaha…. so a whale it is. I wanted to make 2 fishes of similar size but it was too hard, so I ended up with only one whale. 


Assembling showpiece
The following week was about assembling the showpiece. I picked my nice pieces of pastillage and airbrushed it with some green. Then I assembled the pastillage waves onto the cast sugar using melted isomalt. The rock sugar was used as support and also it looks like corals. Pressed sugar starfish and a dome shape where I planned to place the fish was placed on. The pulled green seaweeds and the big fat whale were finally glued on. 

Since I had the pastillage fish made, I thought I can do a 2 sided showpiece. One side with a whale with sexy lips and the other side was the pastillage fish. I am very happy that I tried making the blown fish, I think it gave the simple showpiece a bit of a pop and colour. 
Whale side view
Pastillage fish view


Since everything is made of sugar, it started to melt as I got it home. It was a lot of hard work for such a short time of appreciation. It went into the bin after 2 days. How sad. 

On the next day after finishing our showpiece, we were to finish off a small module on blowing sugar which we couldn't fit in before the final assessment. We had to make a banana, an apple and a pear. The banana looks funny, the apple didn't look juicy but I am most happy with the pear. 


Green pear
Funny looking apple 
Banana or chilli? 
My favourite
Well this comes to the end of my journey in patisserie certificate 4 course and I hope to continue to bake and enjoy even more creations on my own. I am happy that I manage to fulfil my commitment to blog everything I learnt from school. Thank you everyone who has made this journey a pleasant and enjoyable one. Thanks to all my friends who has been reading my blog. I will continue to blog my baking experience. 

Week 46 Pastillage box

The following week we did Pastillage as our sugar medium to build a box. Pastillage is made of icing sugar, cornstarch, white vinegar, glucose syrup, gelatine and water. I think it is also known as gum paste. It hardens up when in contact with air and no one actually eats it because they might break their teeth. 

All the pieces are cut and left to dry
We were given a template to make an octagon shaped box and a fixed amount of pastillage to complete the box with a lid and decorations. The process of making the box was spread across 2 days. Day 1, we cut the pieces and let it dry till the next day. Day 2 , we sanded the pieces with sand paper and then assembled them with royal icing acting as glue. 

Assembling the octagon box
The lid
The box
 Then comes the decorations which I made pretty simple with some butterflies and leaves. Did the border with royal icing and outlined the leaves to give it a bit more colour. Then glued everything on with royal icing and tah-dah! box done. 

Again, I am not too excited about the box, mainly because I can't eat it. Hehe. But I can put chocolates in the box and that will make me a lot happier. 

Week 45 Sugar Casting

Sugar is definitely not as much fun as chocolate. Why? Because I get to eat the chocolate at the end of the day whereas sugar work is not really meant to be eaten. All you get to do with sugar is look at it. 

Sugar! It is usually used to make showpieces for buffet. So it is meant to be art. Yes sugar is beautiful. We did sugar casting, pressed sugar, rock sugar, pulled sugar, pas tillage and the hardest of all, blowing sugar. Blown sugar looks a lot like blown glass. It breaks like glass too. 

I described chocolate as being temperamental and how would I describe sugar now? I think sugar is absolutely hot! Literally ! I got blisters on my thumb the day when we did pulled sugar. There weren't any cotton gloves left and so I only had latex gloves. I used 3 layers of it but it was still too hot. 
Sugar Casting for the base of the showpiece

We made a small little showpiece with sugar where we are required to make a rose , ribbon and the base. I did not like my showpiece very much as we had limited time and I only had lots of red sugar to play with. So my showpiece just looks red! But I guess it is more about learning the techniques.

Pulling sugar can be fun if you can't feel heat. For me it was quite painful but I have to say it does look very pretty. We made some ribbons where we combined the green and the yellow together. The temperature of the sugars has to be almost the same so that pulls evenly. I struggled and finally managed to get one decent looking ribbon. 


Melting the sugar under heat lamp
Then I made a rose and also 2 leaves. The rose took a while as we had to join the each petal on piece by piece. The leaves were a lot easier to make as we had an imprint mould that we pressed the sugar on to get the veins of the leaf. 
My unimpressive showpiece
Ok made all that was required and stuck them together to make a showpiece. Not much I can say about my showpiece except that it is really red. 

Friday 8 November 2013

Week 44 Chocolate Box Assessment

Less than 6 lessons of practical work on chocolate, we are now going to have our assessment on chocolate. We are required to make a chocolate box that is filled with chocolate truffles and moulded chocolates. So 3 things to do in 2 days. We made the chocolate in one day and the box on the next day. 

Well, I didnt take any photos on day 1 because we were just too busy concentrating on tempering the chocolate and making sure we got it right. Chocolate work is actually good if you want to train yourself to be patient. Men should learn how to temper chocolate. It will be useful when they need to deal with their women who are like chocolate in many ways. 

Well, I definitely was trying to be patient with the chocolate but I am glad that we didn't rush it because our chocolate came out beautiful. The moulded chocolate had a nice shine, nice snap, no air pocket, the thickness was about 2mm and the backing off was neat and sealed properly. So happy with the result. 

We didnt get to make many fillings for the assessment. Only had buttered fondant with triple sec. I guess again the reason must be because it is the cheapest option. 

The truffles had Malibu in it, it was just like the ones we had made before. Then we were told to choose a topping of either almonds, desiccated coconut, cocoa powder or just plain couverture. So we picked roasted almonds. But after making 2/3 of our truffles, we saw others making with all different topping, so we finished the rest with cocoa powder topping. 
Everything went well, all chocolates came out nice and we were done for Day 1. All the chocolates were stored in an air conditioned room till the next day.

Day 2, the stress begins. Everyone was there early and all ready to start the day. Firstly, we melted the compound chocolates. We had 3 pots, 2 dark chocolates and 1 of white. Everyone had their own design in mind and we were advised to make the same triangle box that we made before. So I took her advise and did the same triangle box but a few took the challenge and did some really creative work. There was a heart shape box, a rectangular box and a tall square one too. 
Melting compound chocolate
 It was quite amazing to see so many creative artwork in the group. I love the heart shape box , she used a stencil to make the design for the lid which was beautiful. Sorry, I don't post pictures of other people's work unless I have their permission. The most creative one was the square box. It was beautiful and it was my partner's box. She is really very creative and artsy. 

I had 2 designs in my mind for my box and I thought I will do the easier one because of time constraint. I made a marble chocolate sheet and a plain dark chocolate sheet. Then took my time to cut the shapes out with a craft knife. I wanted the side walls to be plain dark chocolate and the lid can be either plain dark or the marbled chocolate. I made one extra lid just in case I broke anything and one extra wall too. 

Our equipment for the day
 The last time I made my chocolate box, I made it too thin and it was so fragile, this time I made sure I made it thicker for insurance sake. So my walls were suppose to be simple piping on the sides with white chocolate. Then i assembled the walls on the base. Nothing broke, so all good. Now time to concentrate on the lid. 
Chocolate walls
Assembling the box
My chocolate leaves
I brought in some cherry tomato leaves from home to make chocolate leaves. I painted chocolate on the back of the leaves and left it to set. Then I gently peeled the leaf off and I was so happy to see the chocolate leaf looking like a leaf! But because it was so thin and delicate, I broke a few pieces when trying to remove the leaves. It's ok, I only needed a few. 
I wanted to try to make a flower with some chocolate petals but wasn't sure if we had enough time. But now that I was happy with the leaves, I thought I could attempt making the flower just for fun. So I did the petals and let it set on a baguette baking tray which had the curves. 
Assembling the flower
I took my time to assemble the petals. But it took so long to make because the chocolate wouldn't set while my hands were holding on the petal. So I had to use my container to hold one petal at a time. While that was setting, I piped the border of the marbled lid. 
I thought I will just present the marbled lid with the leaves and just pipe the borders. Then I am all set. So I started piping the borders with white chocolate. It was nice and simple but my itchy hands decided to add some dark chocolate piping on the border, thinking that it will make it nicer but of course! it didn't. Hmm..... now I am not sure if I should present the leaves or the flower. 

Look at my mess now

Leaves on marble lid
 I did the simple piping on the dark chocolate lid and after what felt like forever of assembling the flower, I stopped at 3 layers. I wish I had more time to make another layer then it will look fuller. I placed the flower slightly off centre with the piping being asymmetrical. Ah! I am happy with this lid. I hope it is not too plain and simple. I decided to present the flower in the end. I think I like this one better. 

Flower on plain dark lid

 Everyone's work was so beautiful. Different designs, different creativity from different minds. Overall a very good day. Thanks Michelle for teaching us chocolate and hopefully sugar work will be fun too. Apparently sugar work is harder than chocolate! Hmm.... so if chocolate is called temperamental, what will sugar be?? Will know next week. :)


Week 43 Chocolate Easter Egg in October?

Last day of October and we are making chocolate easter egg? Haha....This is because it is a requirement in the school outline. Hmm.... since it is halloween, does that mean I need to make a scary spooky egg? 

First off, our trainer showed us a few ways of decorating the egg. Free hand designs, piping in the designs and playing with some coloured chocolates. After looking at so many designs, I still like the simple free form designs, so no spooky egg for me. I did piping of circles in the egg shells with white chocolate. Initially I was happy to leave it at that but a friend said she had some extra yellow chocolate, so I used it to do some dots. I shouldn't have done the dots, I don't really like the yellow. 


Piping designs on the shells
After the white chocolate has set,I brushed in the milk chocolate but had to be careful not to brush away the designs. Then wait for it to set in the fridge. Now it is ready to add another layer of chocolate onto the shell. Ooops!! I forgot to let the shells come back to room temperature before pouring the chocolate in. The chocolate set so fast and I tried to give it a quick swirl and tip the extra chocolate out. Too late! It was a thick and heavy egg! hahaha..... Now it is a dinosaur egg! 
Then it was placed in the fridge to set. After a short while, we had to flip the egg around and place it on a baking tray, this is to loosen the chocolate egg from the shell. Not too long after that, the egg just came out of the shell. 

Waiting for it to set
After the moulds were removed, the fun bit of joining them together to get an egg. We heated up a baking tray in the oven for a short while and placed both the egg rims on it for a few seconds to melt the chocolate.  Then with one quick move, I joined them together and waited for the chocolate to set.  It all happened so quickly that I couldn't reposition it once it got in contact. Yup!! my egg was not sealed perfectly. It was a little crooked. Aarggh! 
Unmoulded
Ah.. luckily we have to pipe a border around the join, now no one can see that it is crooked. hehehe..... maybe I might attempt to make easter eggs for Christmas! Just to see if I can get it right the next time. 
Pipe the joint and hide the flaws
Happy Halloween or Happy Easter?
The next day we made a small chocolate showpiece. We were given a template to follow. First I piped the borders of the design with dark chocolate. Once it was set, I flooded it with milk chocolate and white chocolate. It was suppose to be made of 4 pieces but because it was an intricate design, we made extras, just in case it broke. I made 13 pieces of it. hehe... (well, you can say I was practising my piping skill) 
Borders
Flooding the chocolate
Then I made the base on an acetate and cut it with a round cutter when the chocolate was half set. The base was made thicker to hold all the pieces of delicate work. Another smaller round disc was made to be placed on top. The top disc was made thinner so that the weight won't break the designs. Then we glued the pieces together and because I had so many pieces and they didn't break on me, I placed 8 pieces together and gave it a better support for the top disc. We didn't get to do the decoration on the top disc because of time constraint but I was determined to finish it at home. That is provided it doesn't fall apart on the way home. 

Base for the showpiece
I managed to get the showpiece home in one piece and I wanted to make a flower design on the top. I struggled to stick the petals together because the chocolate took so long to set. It was not a good day for chocolate when the temperature was 28˚C outside. Then with the extra bits, I made a butterfly. I wanted the butterfly to stand at the edge of the disc. It took so long to set, I think my fingers were melting the bits that I was holding. But it finally set. Now its done. It is not very pretty but I am happy with the experience. It was a lot of work and being pedantic about things only makes it harder. haha. But it was worth it. 

Butterfly

Flower
Butterfly in the garden
My chocolate showpiece

Tuesday 29 October 2013

Week 42 Chocolate box

Chocolate! It is not only intimidating, it is temperamental too. There are so many things that you need to look out for when tempering chocolate. Temperature, timing, dust, humidity and I think luck too. The correctly tempered chocolate has a beautiful shine and a nice snap when you break it. Some would describe chocolate to be like women. Beautiful, snappy and temperamental at times. 
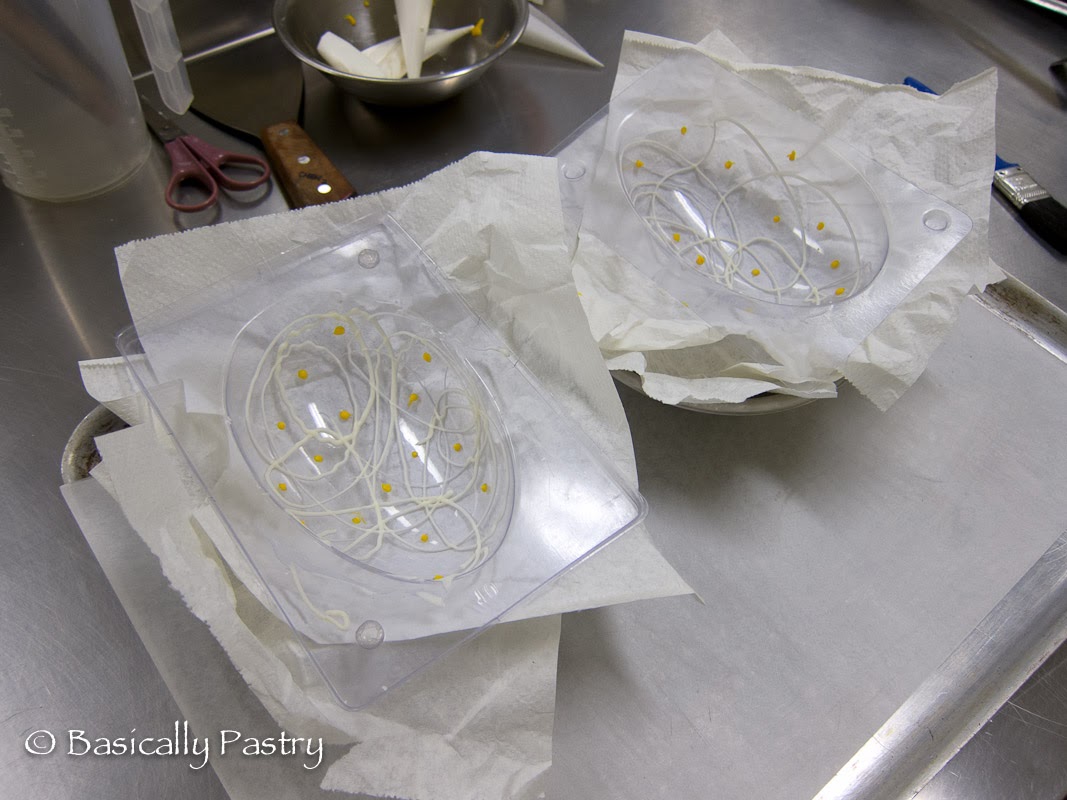
Moulded chocolate
Last week, we tried tempering with the tabling method where we cooled the chocolate down on a marble slab and the addition method where chocolate blocks were added to melted chocolate. This week we tried the direct method which is also the easiest method. First the chocolate is melted over a bain marie to 45˚C - 50˚C. The water should be about 60˚C-70˚C and make sure no moisture goes into the chocolate. Then the chocolate is placed in the fridge to cool down. The chocolate has to be stirred occasionally to even out the temperature. 

Once the chocolate cools down to 27˚C-29˚C, it is reheated to 30˚C-31˚C and now it is ready to be used. I think I might have picked the hardest mould to try on. There are so many edges and corners. It was hard to polish and to brush in the chocolate to make sure you don't miss any corners. 
Nice shine 
Next we made a ganache with malibu for chocolate truffles. Then piped into little balls and left to set on a baking sheet. 
Little ganache balls
 The next item was Orange sticks, first the orange skin is blanched 6 times to remove away the bitterness from the oil on the skin. Yes 6 times! Then it is cooked in sugar syrup for almost an hour. Then it is placed on a rack to cool overnight. 
Orange peel
Brusseler nut Croquant is the next one the list. I don't even know how to read that name. It is made of marzipan and caramel. I don't normally like marzipan but this is actually not too bad. Firstly we cook the sugar then added in warm cream to make caramel. Then it is poured over the marzipan and slivered almonds were added in as well. Then it is kneaded to combine. We left it to cool and then rolled them into long sausages about 1.5cm wide, over cornflour. Then we left it to crust overnight. 

Brusseler Nut Croquant
So that was Thursday, now Friday morning we continue. We tempered more couverture chocolate and dipped half the orange peel into the chocolate and placed it on the baking sheet to set.
Enrobing the orange sticks
The piped truffles were ready to be rolled into balls. Now will be the time when it is good to have cold hands, because you don't want the truffles to melt and be sticky. Then these balls are coated with tempered chocolate. With gloves on, I dapped some chocolate on my palm and rolled the truffles to coat it. It is such a messy job but it was quite fun. Then we dropped the ball into whatever coating we wanted. So we had crushed roasted slivered almonds, roasted desiccated coconut, dutch processed cocoa powder and another was just rough edgy look with the couverture chocolate itself. I like the almond topping the most. 

Rolled truffles

With the marzipan filling, we used the chocolate dipping fork and dipped it in the tempered chocolate. Rolled it to coat and gently tap to drip away excess chocolate. Then gently place on baking paper. Notice there is a lot of gently involved in this? Well chocolate is a very delicate work so got to be gentle. Besides being gently, speed is important too. You got to be quick otherwise the chocolate will set before you can put any topping on it.  
Brusseler Nut Croquant with almond topping
Our trainer showed us the effect of using compound chocolate in moulds and you can see the shine is different to the couverture chocolate. 

Moulds made with compound chocolate
 Chocolate box was the highlight of the day. It was very interesting to make. We had to make a triangular box out of chocolate. We had 2 acetate sheet where we poured white compound chocolate and dark compound chocolate on to make a marble effect. The other acetate is placed on top and air is pushed out from the centre and also to flatten it. Then a rolling pin was used to roll it even. I had too little chocolate on the sheet and it was rather thin. That was a bit dangerous because it means it might crack easily when I have to cut it. I like to live dangerously!! haha.... not really. 
Marbled chocolate sheets
 Then it was chilled in the fridge to set for a short while. Once it is set, it comes away from the acetate a little, that is an indication that it is ready. Then we peel off the acetate slowly and gently, making sure not to break it. Then let it come to room temperature before cutting into it. If you cut when it is still cold, it will crack easily. Now, since my chocolate is so thin, I was extremely careful when I cut the chocolate. It took me quite a while but I didn't break any. Yay! 
Triangle template
Now it is time to assemble the box. We melted some of the marbled chocolate and got milk chocolate. We used that to glue the sides of the box on the base. Because we used compound chocolate, it sets really fast. Now that it is glued together, we are supposed to pipe some beads around the box. It is harder than it looks. The chocolate consistency has to be just right. Either it was too runny or it set inside the piping bag. Haha... I am blaming all my tools when in actual fact, it is all about practise and more practise. 

My triangular box 
Can you tell which piping line is done by my trainer?
Chocolate goodies 
It only fits 3 chocolates! 
Now time to present our chocolate box. Well my chocolate box was rather thin and the corner broke after presenting it. I blame the plate. hahaha....

Chocolate assortment
We were given wrappers and ribbons to wrap our chocolate box to take home. I ate so much chocolates this week. But you know what they say about chocolate, it is a food that makes you happy. So I must be very happy now. 

Life is like a box of chocolate, hopefully it doesn't crack as easily as my chocolate box though. 

Coconut topping, rough edges and cocoa powder truffles